How I set up a self-hosted Mastodon instance for £15 a year

Migrating from the bird site
I’ve recently started using Mastodon during the Great Twitter Migration / Eternal November episode - I’m not a particularly avid Twitter user, I follow a few code and music people, search for my music release mentions, and do occasional music or code-related retweets or self-promotional posts, but for the most part I just lurk and use it as a news/current affairs/opinion/politics source.
Then obviously the big buyout happened. The discourse on the bird site is often fairly idiotic - although that’s by no means unique to Twitter, welcome to the internet. The algorithm feels way too desperate - “hey look at all these vaguely related topics/tweets with annoying clickbaity content - pleeeeeeeease”. You can put up with these annoyances but now some massive billionaire bellend wants to actualise it into some kind of weird far right troll hellscape in the name of specious adolescent Ayn Rand neo-liberal “free speech” fantasies and the potential return of the failed orange wannabe dictactor. Erm, no thanks, that sounds really stressful.
Mastodon and the fediverse in general is really a breath of fresh air - no algorithm, no ads, just the people you follow and your hashtag/search mojo. Brilliant. Plus I’m actually interacting with peeps on there rather than lurking. It feels communal, slower, and a lot less hype-driven. Basically - it’s nerds posting about stuff they think is cool rather than trying to sell you stuff, at least that’s what’s going on in my corner of it, and it’s great. We’ll see how that pans out in time - I probably won’t leave Twitter completely at least while it’s still alive - from a commercial perspective it might still make sense to keep a presence there (or at the very least to not lose my handle), but the jury is out, and for now I’m definitely enjoying Mastodon a lot more.
Trying out a public instance
The big plus is no corporate control. You can join a larger instance, which is what I did at first. I looked at the major servers like mastodon.social but signups were already closed by this time (5th November). I considered php.social which is very active but that seemed possibly a bit too niche as I’m not just about the code nor just about php code. I eventually settled on mastodon.top which is one of the generalist French speaking instances - I grew up in France and speak French so it made sense.
This started off great, but I suspect mastodon.top might have been struggling under the strain of massively increased usage since the Twitter Migration. I soon found my timeline took a day or two to update which was making things a little slow and asynchronous. I’m sure they will get round to fixing that eventually and might already have done so, but it was definitely an issue when I was on there.
Now there are some advantages to being on a bigger instance, notably a ready-made community of peeps who may or may not share your interests. Plus of course the owners are handling the technical aspects and costs of running the server. You should probably think about contributing to those in some way though as it’s certainly not free.
But - being on a large instance is not a pre-requisite for interacting with the Fediverse at all - you can go and visit other servers and connect to them from any server.
Anyway, if you’re geek-inclined like me, you’ll soon turn to thinking about running your own instance. I was specifically inspired when I spotted that Simon Willison, the creator of Datasette, who I’m following on there, had a single user set up, and I started to investigate.
My requirements/spec were very simple:
- Cheap hosting - like really cheap.
- Single user, at least for now. Might possibly add family members later if they’re at all interested, but definitely not up for running a moderated instance.
- Did I mention cheap hosting?
If it didn’t work out, then I could always plump for a more expensive option - although once things start to approach $5 a month I might as well think about opting for a managed instance from mastohost at $6/m - or even look at running it off a raspberry pi or other small form factor machine from our very own living room. This last one would no doubt come with additional technical challenges and costs though especially since we don’t have a fixed ip address.
Hosting
Mastodon can be quite resource-hungry especially during install - it even warns you as much - but in order to get the best available hosting deals I would need to be able to fit it on a minimal VPS somewhere - i.e. 1 GB or below of memory, small-ish ssd etc. I looked at all the usual suspects such as Digital Ocean, AWS, Linode, Fly.io and smaller operators, and in the end found a sweet deal from Ionos for £14.40 per year. This would give me just 512MB of memory and 10GB of SSD space to play with. Yikes!
Before purchasing I thought I’d better test things out locally on a suitably anemic Vagrant box to see if it was even possible. Happily I managed to get Mastodon installed and running with a bit of swap space trickery. I wasn’t too worried about disk space, I’d be offloading the media onto S3 anyway, but would probably need to be meticulous about deleting build resources, and eventually log files etc.
I went ahead and signed up, and followed the steps below - sharing in case they are useful to anyone else!
Installation steps
This assumes we have a fresh Ubuntu 20.04 installation with root ssh access. I’ll just repeat the headline specs for the specific VPS I’m currently using: 1 vCore, 512 MB Ram, 10 GB SSD
You’ll also need:
- A domain name (e.g. 123 reg or whatever your poison is)
- A dns provider (I use Cloudflare but this could be with your hosting or domain name company)
- An S3 compatible object store (AWS, Backblaze, Minio etc are all good options)
- A transactional email service (Elastic Email for me as it has a generous free tier, but you could equally use SES, Sparkpost, Sendgrid etc)
First of all, let’s ssh in and create some swap space to ensure we don’t get OOM errors during install. 1G should be enough but you can increase this if need be - YMMV depending on the actual SSD size.
# this assumes you're logged in as root. you might need to su or sudo if you're not
rm /swap.img
fallocate -l 1G /swap.img
chmod 0600 /swap.img
mkswap /swap.img
swapon /swap.img
Digital Ocean have a good tutorial on adding swap space if you need some further reading around it.
I then installed micro, as it’s my preferred server editor. If you’re cool with nano or a vim wizard, of course you can just use those and replace micro with your editor of choice in the following steps.
I then pretty much went through the set up instructions as per the official guide but I’ll add some comments and edits where things diverged.
The first bit is really straight forward, we’re installing curl, node, postgresql, yarn, nginx, and a bunch of other system dependencies.
apt update
apt install -y curl wget gnupg apt-transport-https lsb-release ca-certificates
curl -sL https://deb.nodesource.com/setup_16.x | bash -
wget -O /usr/share/keyrings/postgresql.asc https://www.postgresql.org/media/keys/ACCC4CF8.asc
echo "deb [signed-by=/usr/share/keyrings/postgresql.asc] http://apt.postgresql.org/pub/repos/apt $(lsb_release -cs)-pgdg main" > /etc/apt/sources.list.d/postgresql.list
apt update
apt install -y \
  imagemagick ffmpeg libpq-dev libxml2-dev libxslt1-dev file git-core \
  g++ libprotobuf-dev protobuf-compiler pkg-config nodejs gcc autoconf \
  bison build-essential libssl-dev libyaml-dev libreadline6-dev \
  zlib1g-dev libncurses5-dev libffi-dev libgdbm-dev \
  nginx redis-server redis-tools postgresql postgresql-contrib \
  certbot python3-certbot-nginx libidn11-dev libicu-dev libjemalloc-dev
corepack enable
yarn set version stable
We then come to setting up our mastodon user and getting ready to install Ruby. Again, the first section goes without a hitch.
adduser --disabled-login mastodon
su - mastodon
git clone https://github.com/rbenv/rbenv.git ~/.rbenv
cd ~/.rbenv && src/configure && make -C src
echo 'export PATH="$HOME/.rbenv/bin:$PATH"' >> ~/.bashrc
echo 'eval "$(rbenv init -)"' >> ~/.bashrc
exec bash
git clone https://github.com/rbenv/ruby-build.git ~/.rbenv/plugins/ruby-build
Next we install Ruby itself which takes an extremely long time. I wound up opening another ssh session and doing a tail -f on the logs to keep an eye on things but you can also just run it with --verbose in the first place to alleviate the paranoia.
RUBY_CONFIGURE_OPTS=--with-jemalloc rbenv install 3.0.4 --verbose
Then set rbenv, install bundler and exit back to root:
rbenv global 3.0.4
gem install bundler --no-document
exit
I then went over to pgTune as suggested and generated the following config for PostgreSQL 15:
max_connections = 200
shared_buffers = 128MB
effective_cache_size = 384MB
maintenance_work_mem = 32MB
checkpoint_completion_target = 0.9
wal_buffers = 3932kB
default_statistics_target = 100
random_page_cost = 1.1
effective_io_concurrency = 200
work_mem = 327kB
min_wal_size = 1GB
max_wal_size = 4GB
I then went through /etc/postgresql/15/main/postgresql.conf manually and updated all the above entries, uncommenting where necessary. I could then restart postgres, and create the mastodon DB user:
systemctl restart postgresql
sudo -u postgres psql
CREATE USER mastodon CREATEDB;
\q
Now onto installing Mastodon itself.
su - mastodon
git clone https://github.com/tootsuite/mastodon.git live && cd live
git checkout $(git tag -l | grep -v 'rc[0-9]*$' | sort -V | tail -n 1)
bundle config deployment 'true'
bundle config without 'development test'
bundle install -j$(getconf _NPROCESSORS_ONLN)
yarn install --pure-lockfile
I had to set up node with some additional memory first so that the next command wouldn’t bork with an OOM. I’ll be honest and say that I’m not quite sure why this is even necessary and it doesn’t just use the swap space.
# we're giving it 1.25 GB which seems to do the trick
export NODE_OPTIONS="--max-old-space-size=1280"
Then run the interactive setup wizard - this will ask you a load of questions before creating your .env.production file and running the asset build steps. If you don’t have all the credentials handy, just chuck in some placeholders, you can edit .env.production later. You can leave DB/Redis passwords blank (they are restricted to the server so all good). You’ll also be setting up your primary admin user, so make sure you keep a note of the auto generated password. You can change it later. I set my instance up as single user with no signups allowed.
RAILS_ENV=production bundle exec rake mastodon:setup
The last bit, compiling assets, will also take a very long time with no prompts as to what is happening, but should complete eventually. Go and have a cup of tea, or dinner, or something.
If for any reason it does fail with an out of memory you can retry just the compile step with RAILS_ENV=production bundle exec rake assets:precompile. You might need to fiddle with the swap size (as root) and/or the node options space size setting if you’re having trouble here.
Now is a good time to finish editing .env.production if you didn’t put all the creds into the wizard. You’ll need your S3 bucket and Transactional email smtp details handy.
NB: re setting up S3 - I pretty much followed this how-to but I additionally had to set object ownership permissions ACL to enabled as per this stackoverflow answer.
I then canned the node_modules directory to free up disk space and went back to root to set up nginx.
rm -rf node_modules
exit
cp /home/mastodon/live/dist/nginx.conf /etc/nginx/sites-available/mastodon
ln -s /etc/nginx/sites-available/mastodon /etc/nginx/sites-enabled/mastodon
micro /etc/nginx/sites-available/mastodon
You’ll then need to replace example.com with whatever your server is, and you can also uncomment the ssl cert lines. Then save and onwards.
Before going onto the next step and setting up letsencrypt, you will need to have your DNS configured. I added an A record on Cloudflare to point to the server ip.
You can’t run the exact letsencrypt command currently outlined in the official instructions at least in this environment, as it fails in a frustrating logical loop - essentially telling you that you can’t set up any ssl certificates without already having ssl certificates set up 🤷
I ran the following:
certbot -d your.domain.com certonly --standalone
systemctl restart nginx
Then added the following entry to /etc/crontab manually
0 0,12 * * * root sleep 2777 && certbot renew -q --nginx
Almost there - I can now visit my domain and see the Mastodon error page. Just need to set up the mastodon services.
cp /home/mastodon/live/dist/mastodon-*.service /etc/systemd/system/
systemctl daemon-reload
systemctl enable --now mastodon-web mastodon-sidekiq mastodon-streaming
And… that’s it! I can successfully log in to my Mastodon instance using the password I noted down earlier and set everything up.
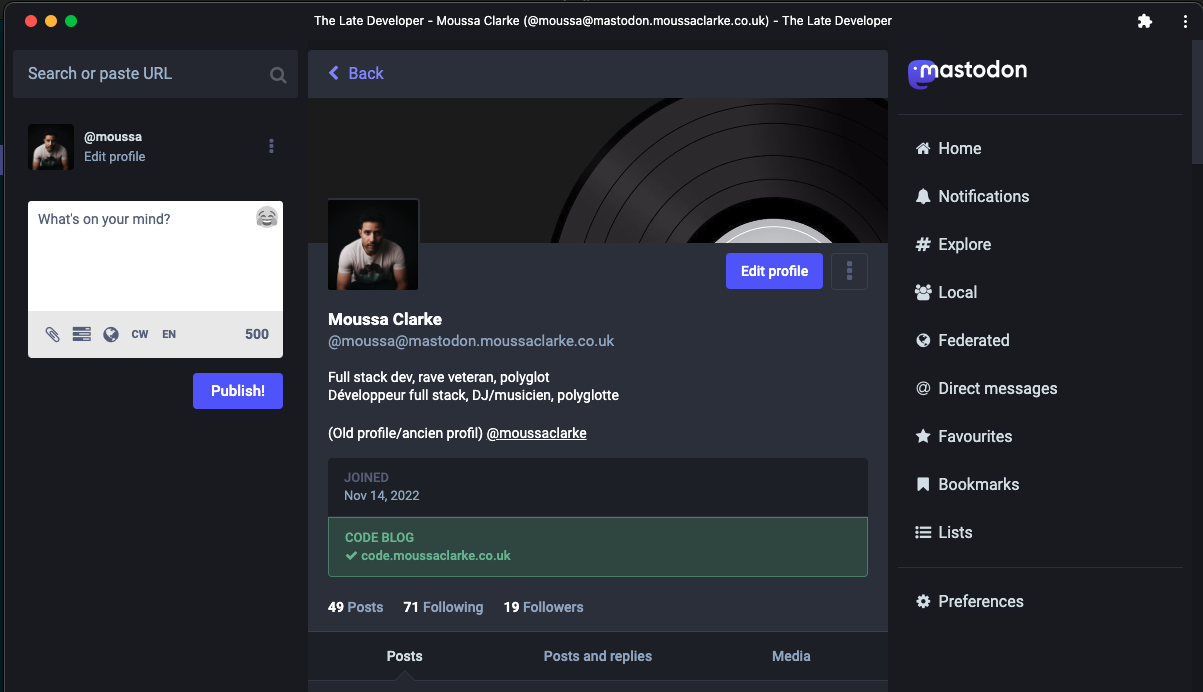
A working server
I followed the inline instructions to migrate from my old account, which was relatively painless. Most of my few followers came over without a hitch, although all my posts remain on the legacy server - I did download them for posterity but you can’t re-upload them to your new account.
I also blocked a few well known problem domains just in case - you can look at bigger instances to get a steer on that. That’s possibly being slightly over-cautious as it’s just a single user instance but you never know - I don’t think my tiny server could handle an influx of spammy crypto bros.
I’ve done a couple of upgrades since then, and they were very easy indeed. I did make sure to remember to clear out ruby deps with bundle clean and to delete my node_modules directory and yarn cache clean after every build.
My server is definitely not the fastest, with noticeable lag, no doubt on account of the low memory and all that swap file activity, but it seems to be holding up ok so far. I’m getting much more frequent updates from my follows than when I was on the public server. On the negative side, discovery does seem a little disjointed - search results are often fairly sparse, possibly because I’m not using relays? Not sure if that’s necessarily wise on my little minnow server anyway, something to research. I can still visit other servers and see what’s going on in the wider fediverse so it’s all good.
Will see how it pans out, but in the meantime you can find me at @[email protected]!